
Collecting Registrations Using Third-Party Tools (Recommended)
Nowadays people in general are not willing to waste much time to join a meeting or webinar. Collecting leads is always important, but we usually don't recommend using GoBrunch for this end.
Based on our experience observing hundreds of webinars, here's the best recommendation that we have if you're looking to collect more data from your attendees.
In GoBrunch, create a Meeting, Webinar, Classroom or Event and click on No once you're asked if you want to collect registrations. You can see the difference between them here. You can check how to create here.
Use a calendar tool such as Calendly and create an event type that allows multiple people to book.
Add 2 or 3 available date slots for people to register. It can be fixed or recurring dates. By doing that, you're maximizing the reach as many of them might not be able to attend the first date.
Add the GoBrunch link as a custom link. All webinars will have the same link which makes it easier to track records and join. You can see how to set this up here.
At the day of the event you just need to join and share your screen. Your uploaded files will be already there, ready to be downloaded.
Your attendees will just need to type their names and choose an avatar picture prior to joining as shown in the pictures below.
After the event is over, get to the dashboard and download the registrations. While you don't have their emails, you can check their names and match manually with the list generated by your calendar tool.
Instructions for the Attendees:
1. Join the webinar link using your laptop. We recommend using Google Chrome from Windows or Mac. If you cannot connect with a pc, you can join using Safari v14 or up in iOS, or Chrome in Android. If you're on Android, make sure you're not using a native web browser. Copy the link and paste on your Google Chrome to make sure you're at the right one.
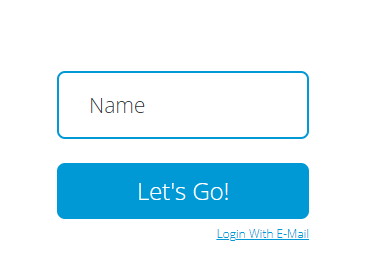
2. Type your name
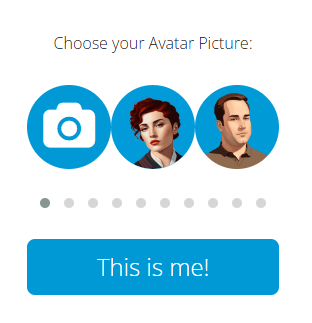
3. Choose an avatar picture
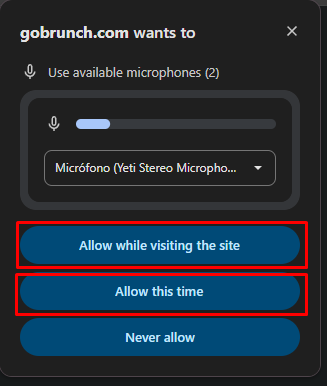
4. A pop-up will appear in the top-left corner of your screen asking for site permissions. Click "Allow While Visiting This Site" or "Allow This Time" to grant access.
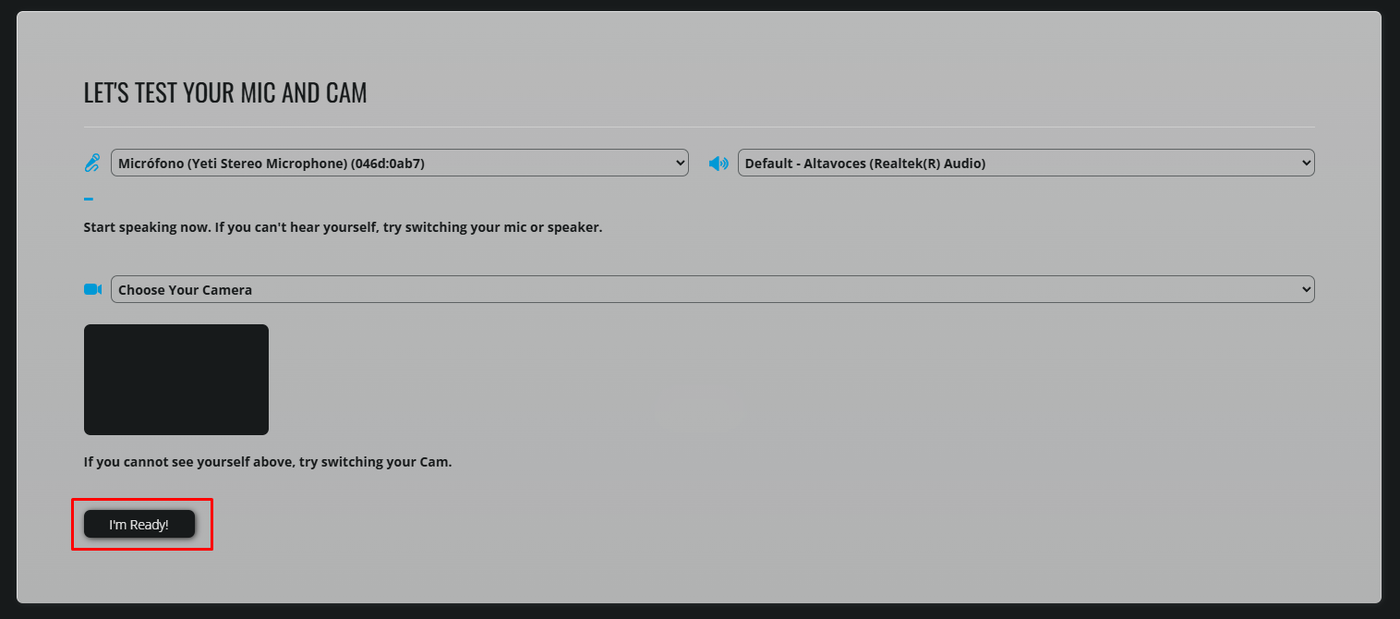
5. A second pop-up will appear, where you can test your camera, microphone, and speakers to make sure everything is set up and working correctly.
6. You'll see the event's virtual room with a "Tap Anywhere to Enter" message. Click anywhere on the screen to enter.

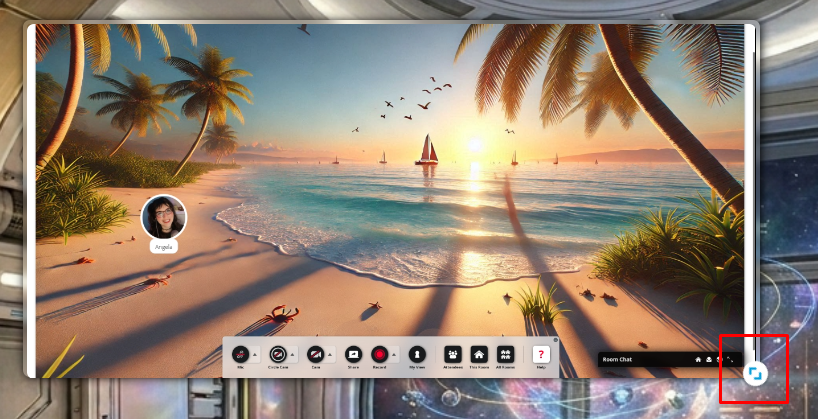
7. Once you enter, you'll be automatically seated in a circle within the room. Feel free to move to a different seat at any time.

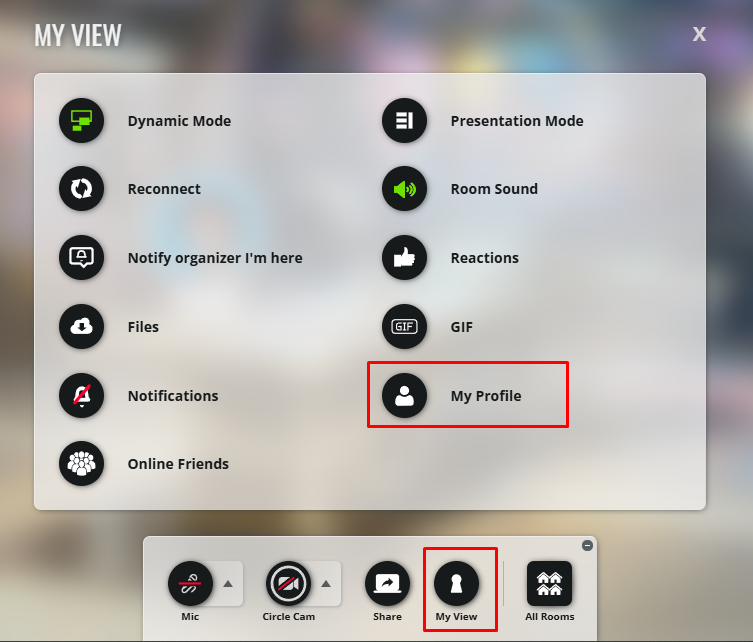
8. If you want to change your name or your avatar picture, click on My View > My Profile located at the bottom bar.
9. Once you see the screen share from the presenter, you can drag the edges to make it larger.
10. Enjoy.
You can send troubleshooting tips here.
You can check these articles for more information about how to join a meeting, attendee views, view modes, and related features:
Collecting Registrations Using GoBrunch
You can collect data using the Community feature, check out this article for more information.